Local AI with Ollama on Proxmox
Published: February 2026
I always wanted to run AI models locally without any cloud APIs, no subscriptions, no data leaving my network. The goal was to build a local chat interface and a coding assistant I could access from any machine on my LAN. I understand that this will not be as powerful as cloud-based models, but it will be enough for my needs. I would like to document my setup here, talk about my research and decisions, for the sake of sharing my experience and knowledge with others who might be interested in doing the same, and not sure from where to start.
First of All Why Run AI Locally?
- Privacy: Obviously, everything is local. No data leaves my network. For example, I use
Paperless-NGX for receipts, family related documents, bank statements, etc. Processing these via
local LLMs means no data ever hits an external API. I can utilize these documents for various tasks, such as
summarizing, extracting information, etc.
I also recently found the Paperless Stack which includes additional features for Paperless-NGX, such as Paperless AI and Paperless GPT. This enables local OCR scanning, autotagging, and AI-driven document analysis, it works perfectly with my setup.
- Cost and Learning: With how fast AI is evolving, cloud providers are constantly updating their pricing models. I believe in the near future every company will have their own local AI infrastructure to avoid paying for cloud APIs and it's a good time to start learning about it.

The Research and Decision
Before buying anything, I spent a lot of time on Reddit r/LocalLLaMA and r/LocalLLM to understand what fits my hardware.
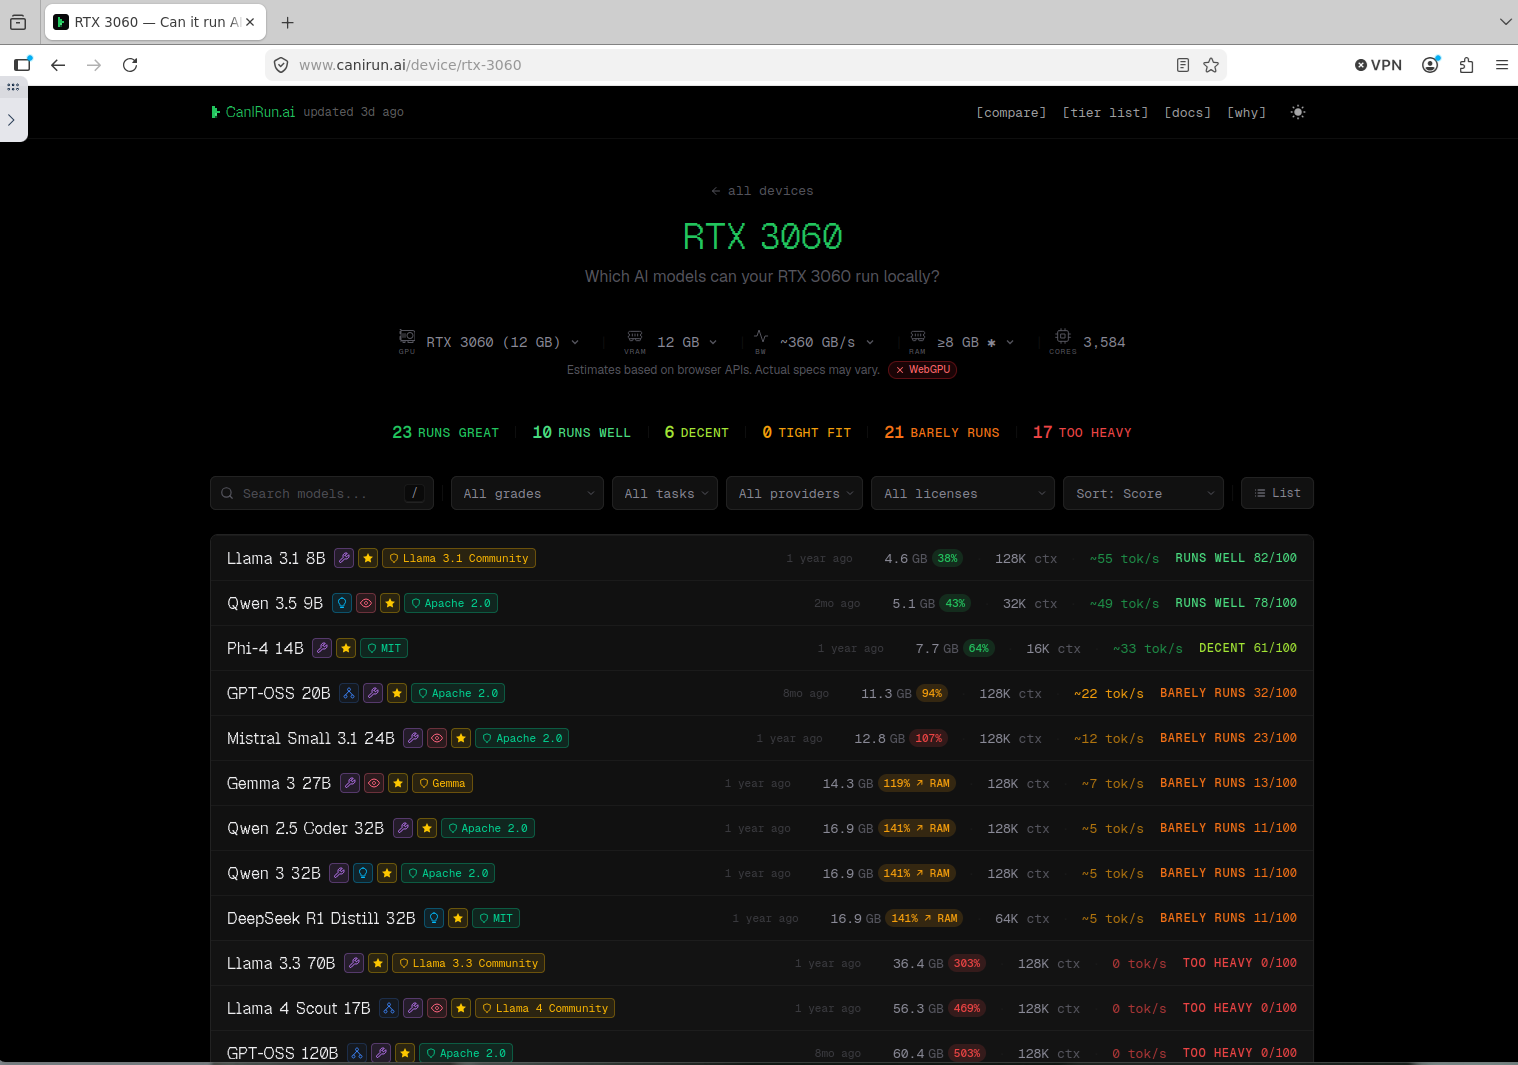
canirun.ai is also a great resource to see which models fit specific GPU memory.
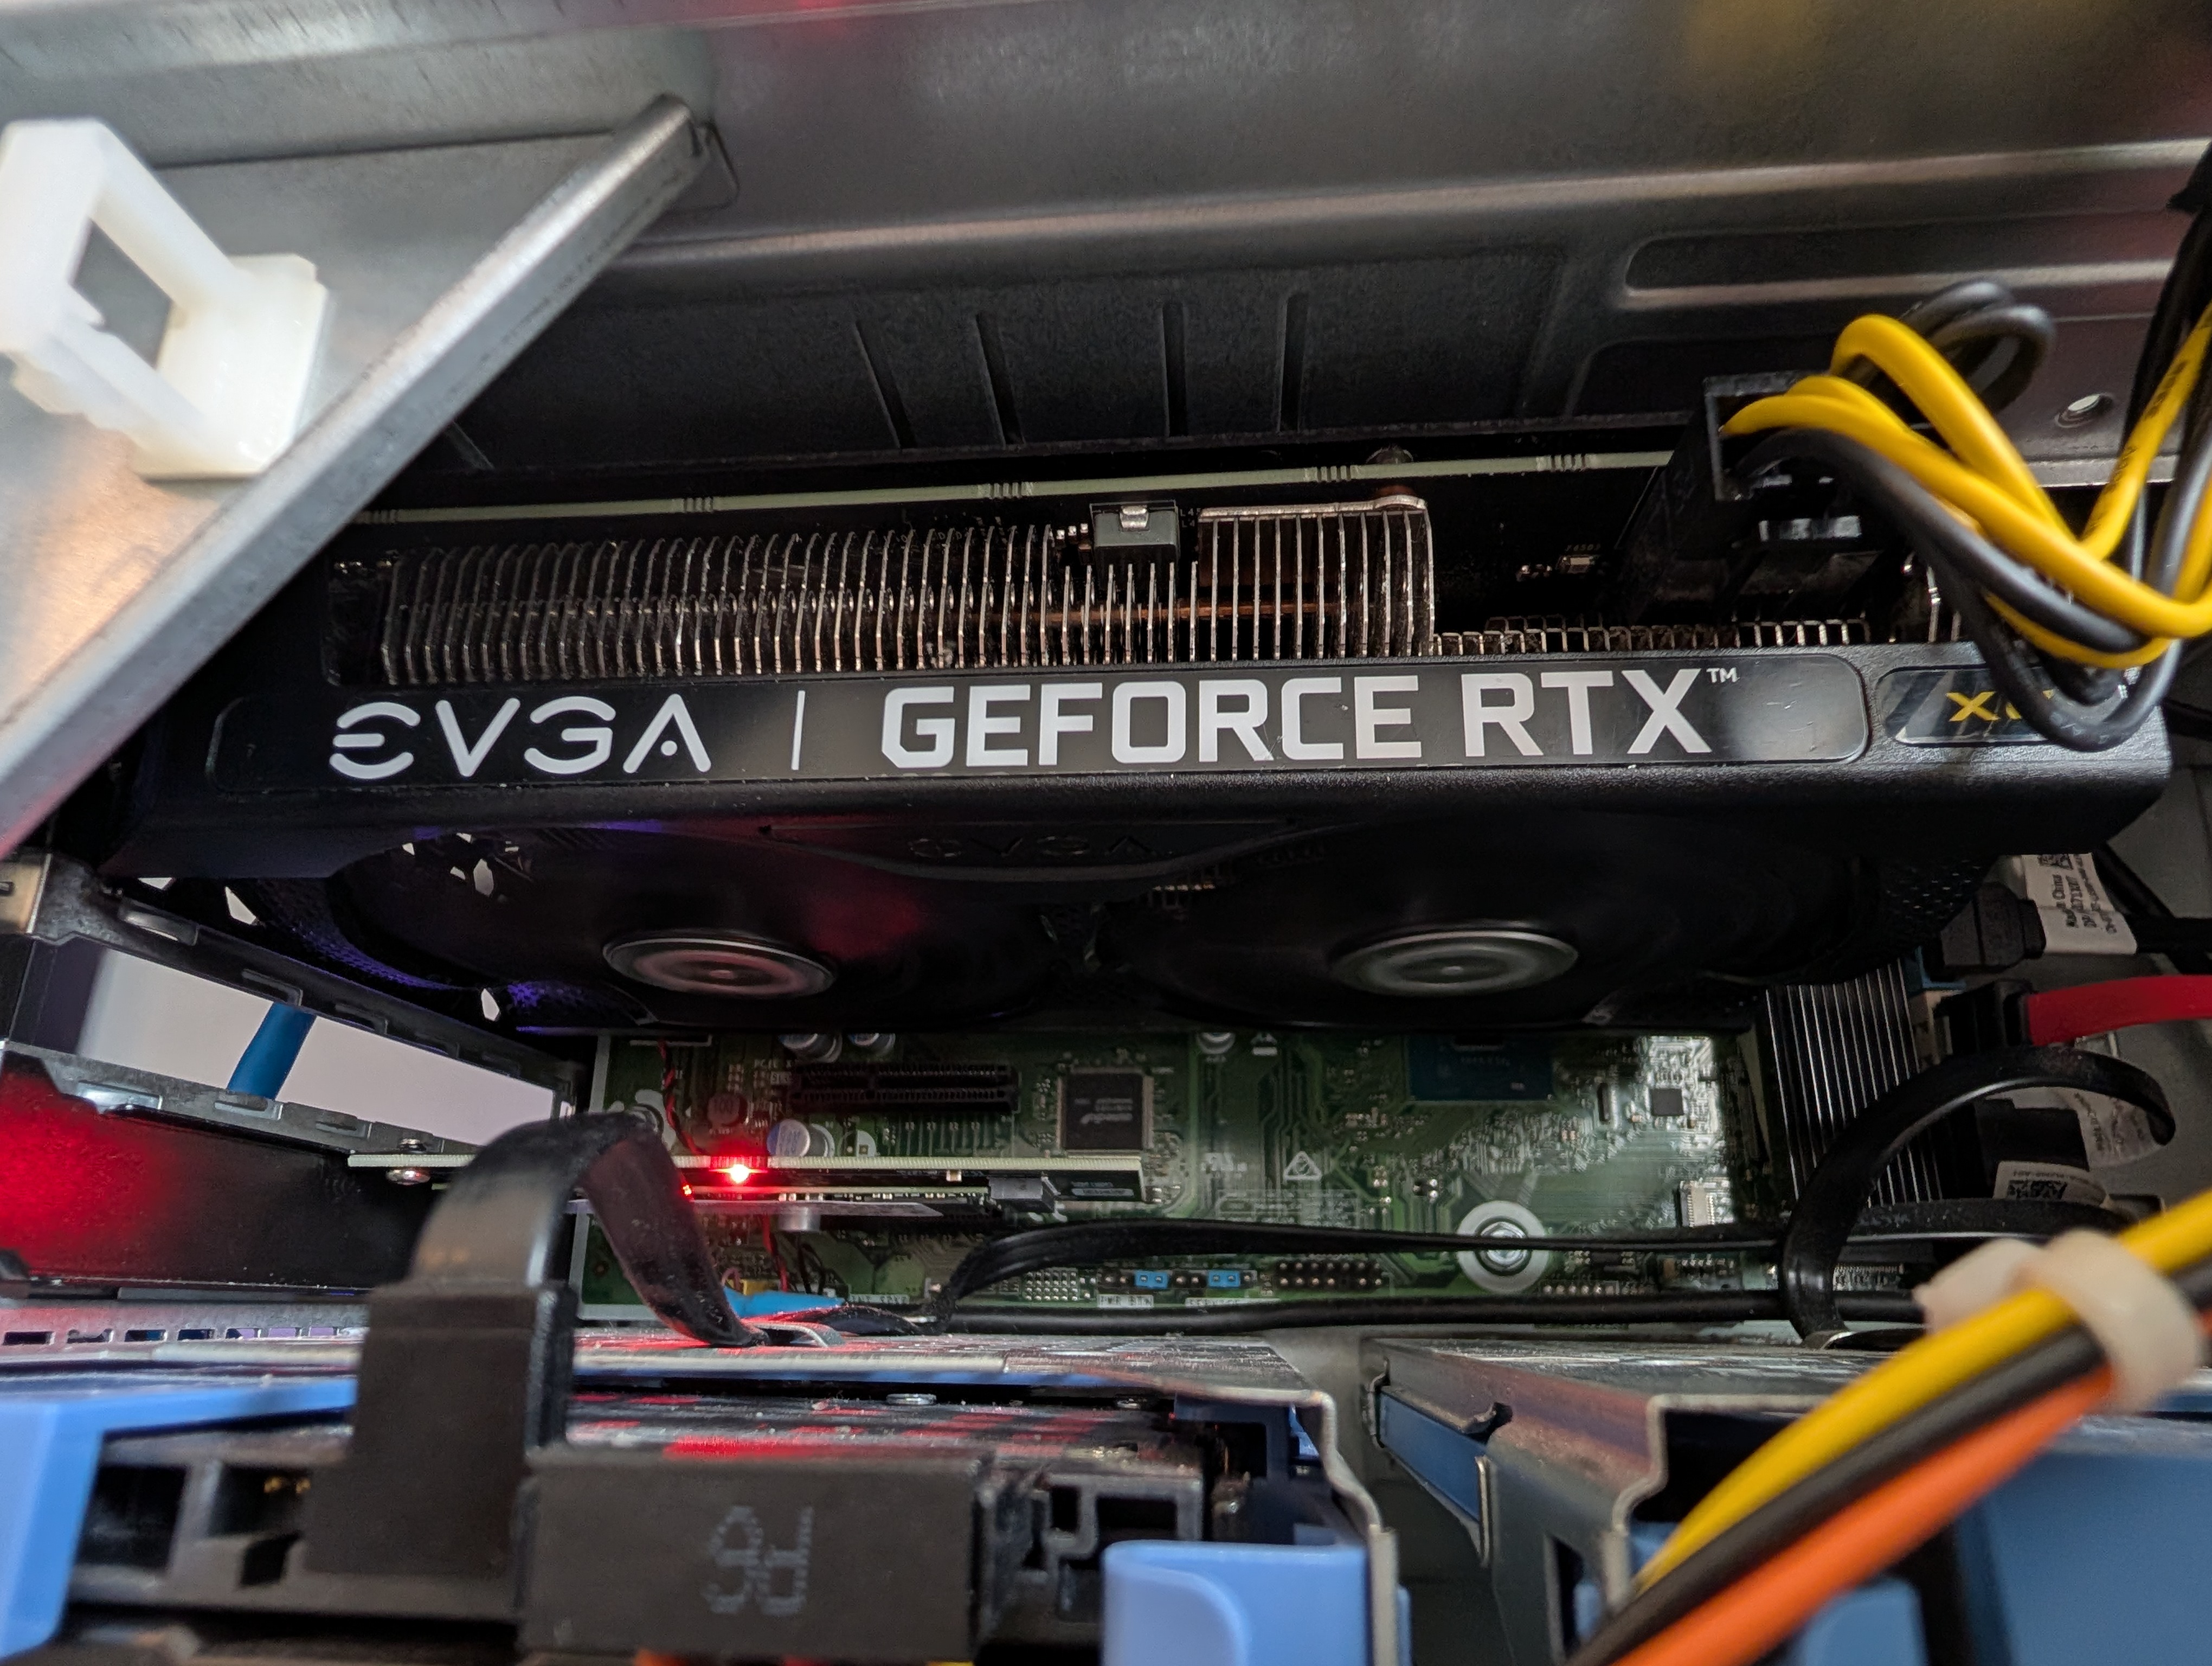
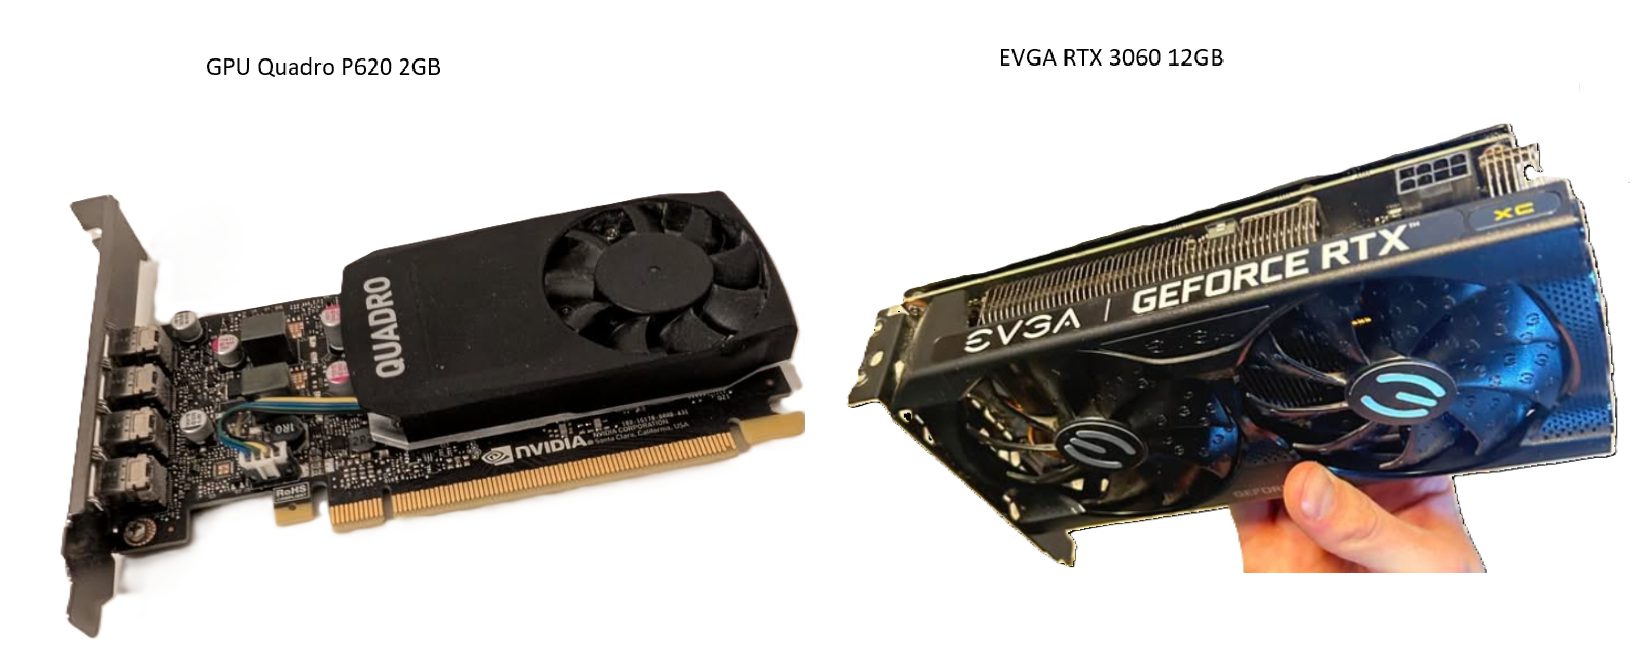
I wasn't looking for something massive, just a solid starting point for coding assistance and experimenting. I had a few options: a dedicated AI PC, a Mac Mini M4, or upgrading my existing Proxmox Node. Since my original GPU was only 2GB, I bought a used EVGA RTX 3060 XC 12GB for $250.
Apple's unified memory is excellent, but a Mac Mini with 12GB RAM isn't much better than an RTX 3060, and 24GB+ models are expensive. Upgrading my existing Proxmox node with a $250 GPU kept everything in one node and utilized the 48GB of system RAM I already had.
Architecture Overview
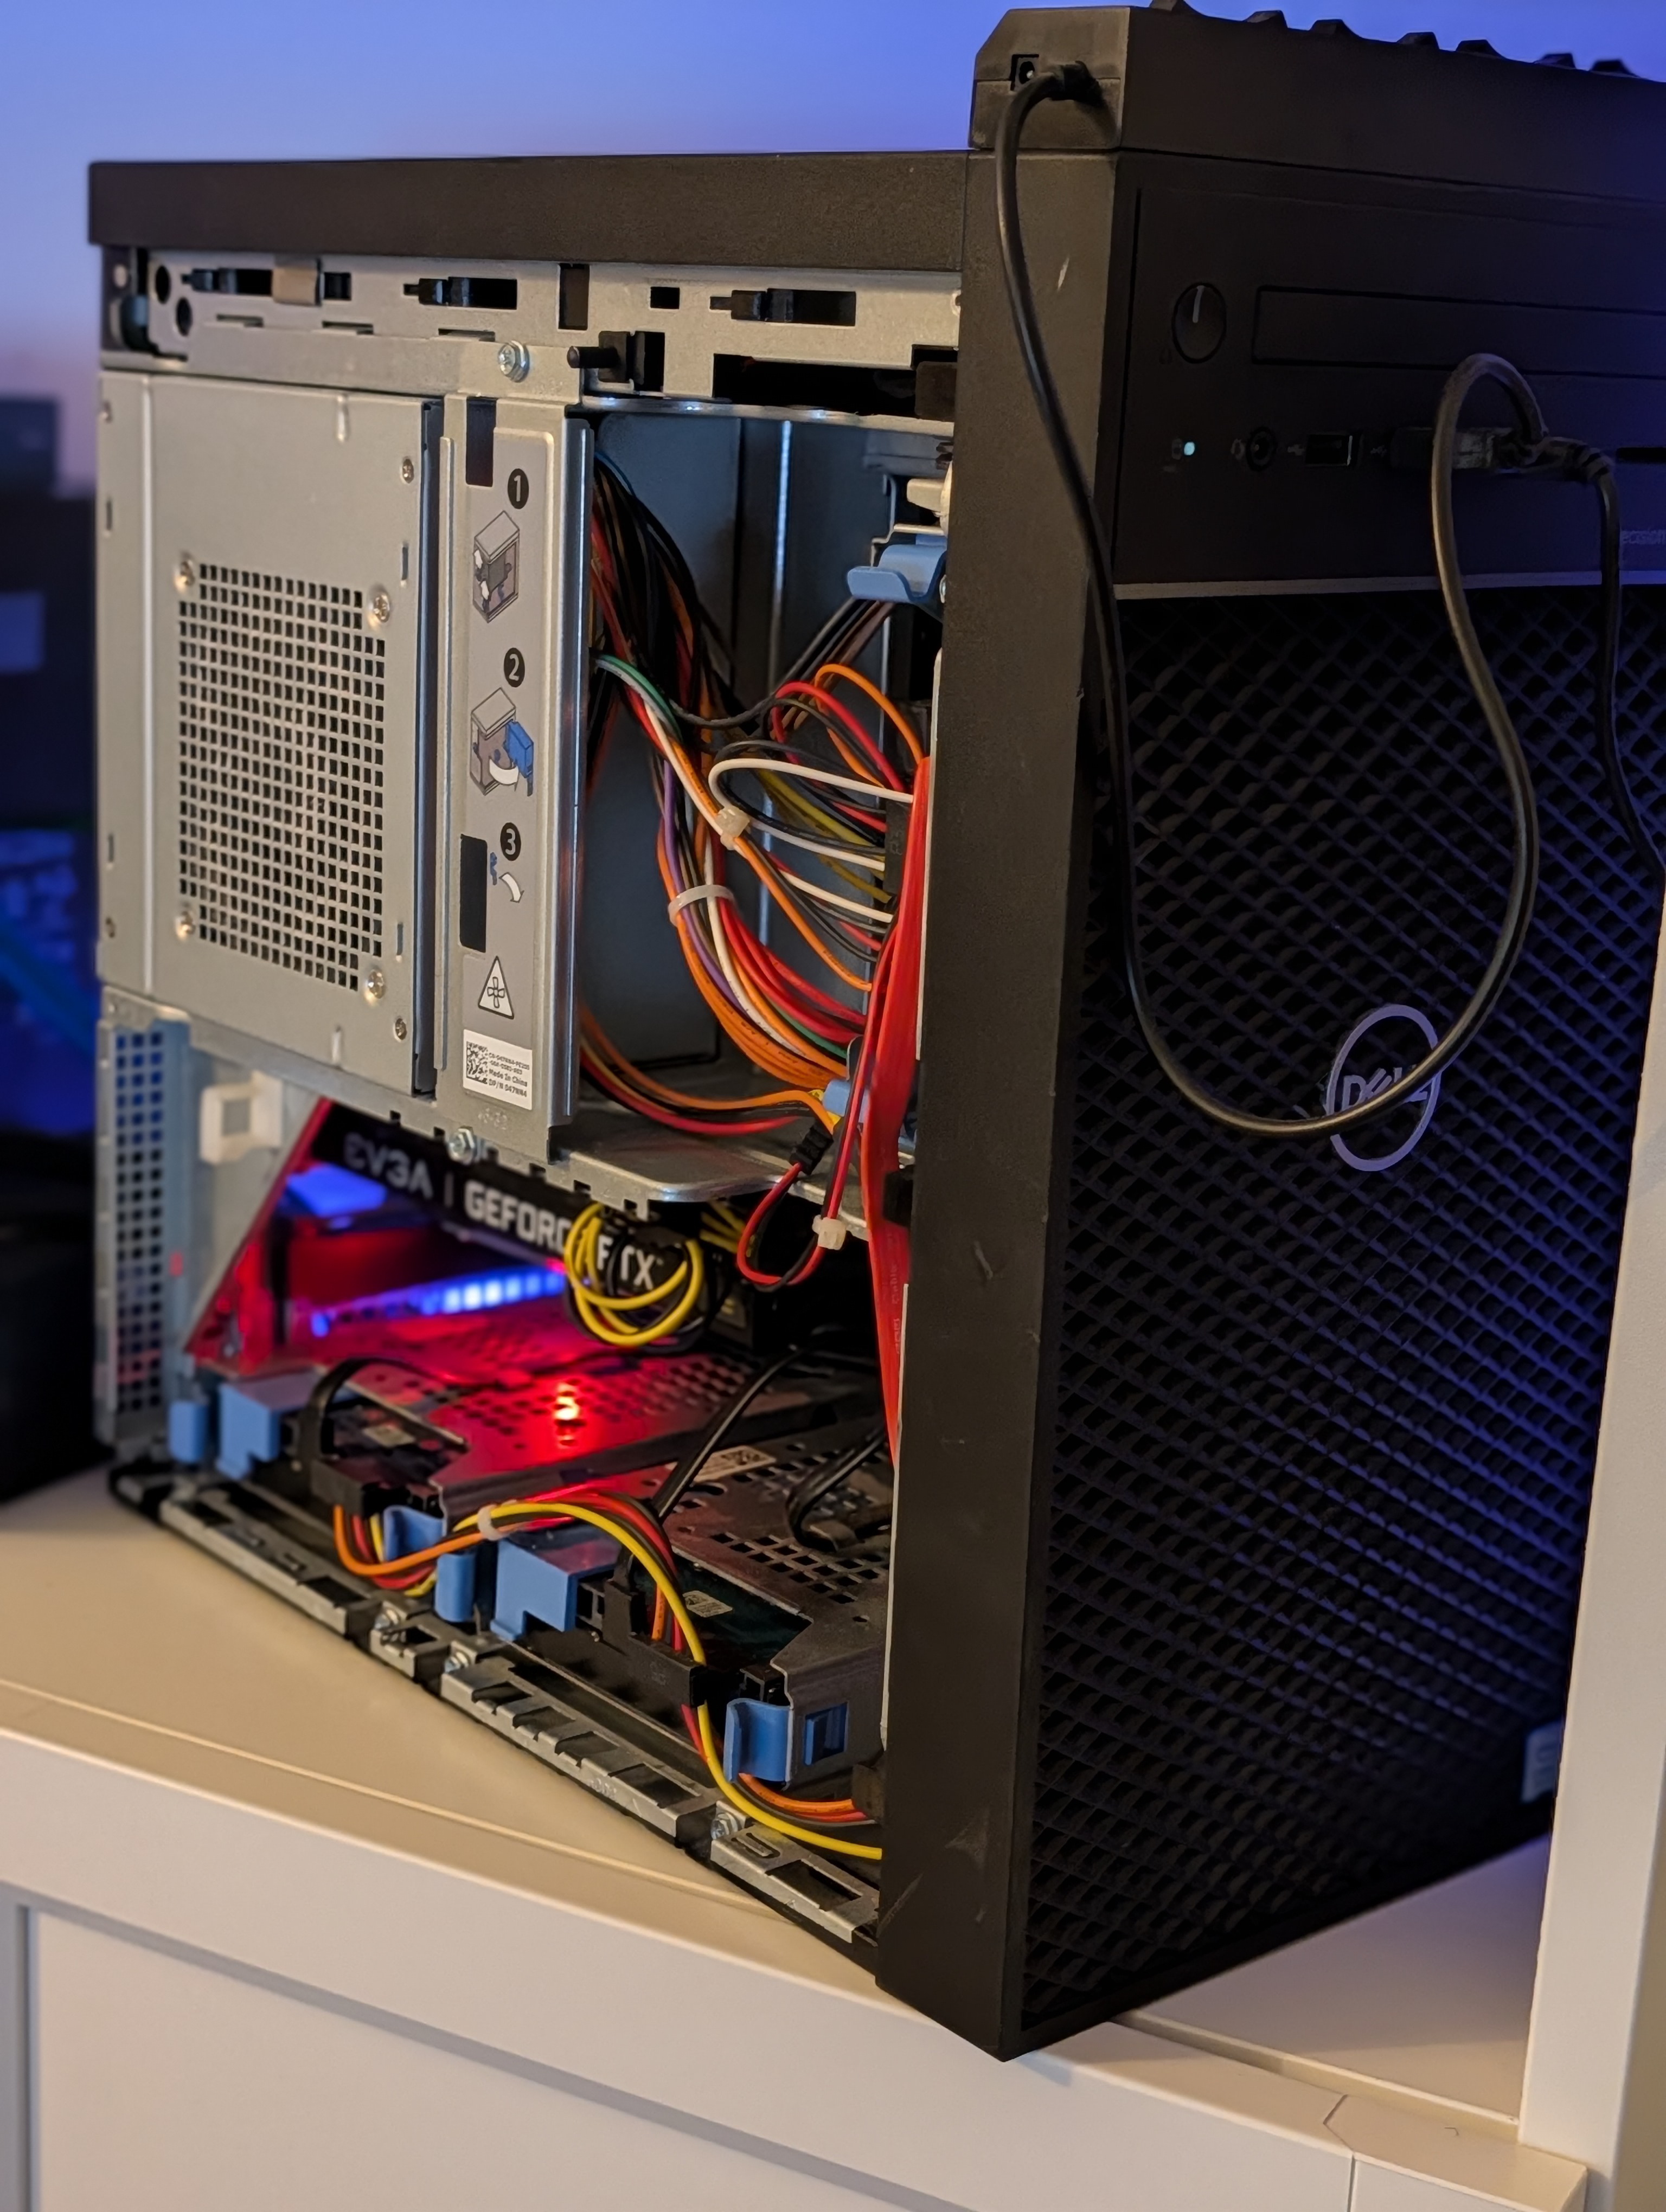
Everything runs on a Dell Precision 3630 Tower inside a Proxmox LXC container with NVIDIA GPU passthrough. I found it a great and cheap way to add AI capabilities to an existing homelab node.
So, to be clear, I'm not using Proxmox just for AI. I run multiple apps on this node, and it is just a one LXC container where Ollama lives alongside them.
├── NVIDIA Driver 550.163.01 (kernel module)
├── GPU: EVGA RTX 3060 XC 12GB
└── LXC (Ubuntu 24.04, GPU passthrough)
├── Docker + NVIDIA Container Toolkit
├── Ollama (GPU inference)
├── Open WebUI (local chat interface)
└── Consumed by clients on the LAN
├── VS Code + Continue (coding assistant)
└── Paperless-NGX AI / document workflows
The GPU lives on the Proxmox host and is bind-mounted into the LXC container. Inside the LXC, Docker containers access the card via the NVIDIA Container Toolkit. This setup lets the LLM run 100% on GPU while using very little additional host resources.
Hardware
| Component | Spec | Notes |
|---|---|---|
| Server | Dell Precision 3630 Tower | Bought used on eBay |
| CPU | Intel Core i7-9700 (8 cores, 3.0GHz) | 65W TDP, plenty for LLM serving |
| RAM | 48GB DDR4 | Ollama LXC container so far is pretty happy with 8GB RAM |
| GPU | EVGA GeForce RTX 3060 XC 12GB | Upgraded from NVIDIA Quadro P620 (2GB VRAM) - you can't run anything on 2GB VRAM lol |
| PSU | Dell 460W 80+ Gold | Handles the 3060 fine. There are 460W and 500W versions of this PSU. I was hesitant to upgrade it, but it's been running fine so far on 460W. |
Installation Process:
Step 1: NVIDIA Driver on Proxmox Host
Proxmox 9 runs on Debian Trixie (currently in testing) with kernel 6.17+. The standard apt install nvidia-driver often fails because the DKMS module doesn't support the newer kernel APIs yet. You can find more details on this in the Debian Wiki.
The fix is using trixie-backports, which contains a patched driver (550.163.01+) that compiles correctly against kernel 6.17:
# Blacklist nouveau first on your Proxmox node
cat > /etc/modprobe.d/blacklist-nouveau.conf << EOF
blacklist nouveau
options nouveau modeset=0
EOF
update-initramfs -u
reboot

# After reboot, add backports with non-free
# (add to /etc/apt/sources.list.d/)
apt update
apt install -t trixie-backports nvidia-kernel-dkms nvidia-driver
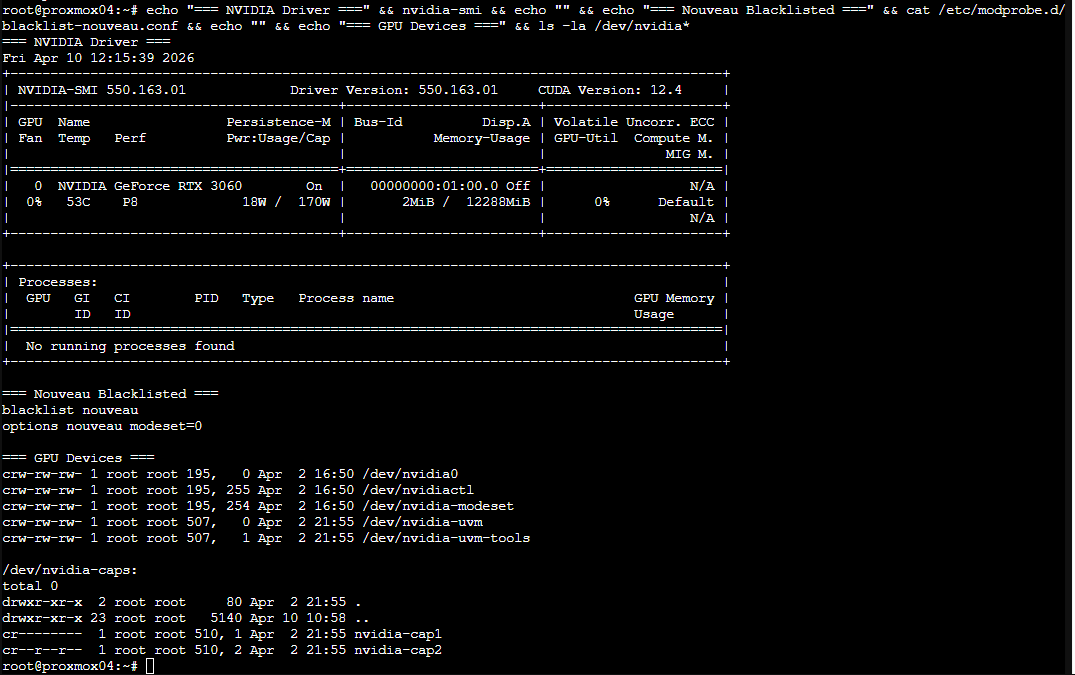
After the install, run this to verify everything is in place:
echo "=== NVIDIA Driver ===" && nvidia-smi && echo "" && echo "=== Nouveau Blacklisted ===" && cat /etc/modprobe.d/blacklist-nouveau.conf && echo "" && echo "=== GPU Devices ===" && ls -la /dev/nvidia*nvidia-smi output should show your GPU:
One more critical step - ensure /dev/nvidia-uvm devices exist on boot. Add this to root's crontab on the host:
@reboot /usr/bin/nvidia-modprobe -u -c=0Without this, the UVM devices won't be created until something triggers them, and your LXC won't see the full GPU device set on startup.
Step 2: Provisioning the LXC Container
Before doing anything with GPU passthrough, you need an LXC container to work with. There are a few ways to create one: manually through the Proxmox UI, via pct create, or from a hardened template if you have one. For this setup I used the community helper script from community-scripts.org:
bash -c "$(curl -fsSL https://raw.githubusercontent.com/community-scripts/ProxmoxVE/main/ct/ubuntu.sh)"It walks you through the LXC config interactively. I went with Ubuntu 24.04, 8GB RAM, 1 core, and stored it on my NVMe drive. The 8GB is a cgroup memory limit - the LXC shares the host's physical RAM, so this just caps how much it can use. Ideally you'd use your own hardened template in production, but for a homelab this gets the job done fast.
Step 3: GPU Passthrough to LXC Container
I chose LXC over a VM because LXC containers share the host kernel. This allows multiple containers to potentially share the same GPU, whereas VM passthrough (via IOMMU/VFIO) is usually exclusive to one VM. More on the benefits of LXC passthrough can be found in the Proxmox Wiki.
First, check your device major numbers on the Proxmox host first:
ls -la /dev/nvidia*
# crw-rw-rw- 1 root root 195,   0 ... /dev/nvidia0
# crw-rw-rw- 1 root root 195, 255 ... /dev/nvidiactl
# crw-rw-rw- 1 root root 507,   0 ... /dev/nvidia-uvm
# crw-rw-rw- 1 root root 507,   1 ... /dev/nvidia-uvm-tools
Stop the LXC, then add GPU passthrough to its config (/etc/pve/lxc/<CTID>.conf):
lxc.cgroup2.devices.allow: c 195:* rwm
lxc.cgroup2.devices.allow: c 507:* rwm
lxc.cgroup2.devices.allow: c 510:* rwm
lxc.mount.entry: /dev/nvidia0 dev/nvidia0 none bind,optional,create=file
lxc.mount.entry: /dev/nvidiactl dev/nvidiactl none bind,optional,create=file
lxc.mount.entry: /dev/nvidia-uvm dev/nvidia-uvm none bind,optional,create=file
lxc.mount.entry: /dev/nvidia-uvm-tools dev/nvidia-uvm-tools none bind,optional,create=fileStart the LXC and verify the devices are mounted:
# Inside the LXC
ls -la /dev/nvidia*
You should see nvidia0, nvidiactl, nvidia-uvm, and nvidia-uvm-tools. The devices are there, but the LXC doesn't have the userspace libraries yet - that's the next step.
Install the NVIDIA userspace libraries inside the LXC using the .run installer. The driver version must match the host (550.163.01):
# Inside the LXC container
apt update && apt install -y build-essential
wget https://us.download.nvidia.com/XFree86/Linux-x86_64/550.163.01/NVIDIA-Linux-x86_64-550.163.01.run
chmod +x NVIDIA-Linux-x86_64-550.163.01.run
./NVIDIA-Linux-x86_64-550.163.01.run --no-kernel-module --silent

# Verify - should show the GPU
nvidia-smi
The --no-kernel-module flag is super important. The host already has the kernel module loaded - the LXC just needs the userspace libraries (libnvidia-ml, nvidia-smi, etc.) to talk to the already-loaded kernel driver through the bind-mounted devices.
Step 4: Docker + NVIDIA Container Toolkit
Inside the LXC, install Docker and the NVIDIA Container Toolkit so Docker containers can access the GPU:
# Install Docker (standard Docker CE install for Ubuntu)
apt install -y ca-certificates curl gnupg
install -m 0755 -d /etc/apt/keyrings
curl -fsSL https://download.docker.com/linux/ubuntu/gpg | gpg --dearmor -o /etc/apt/keyrings/docker.gpg
echo "deb [arch=$(dpkg --print-architecture) signed-by=/etc/apt/keyrings/docker.gpg] \
  https://download.docker.com/linux/ubuntu $(. /etc/os-release && echo "$VERSION_CODENAME") stable" | \
  tee /etc/apt/sources.list.d/docker.list > /dev/null
apt update
apt install -y docker-ce docker-ce-cli containerd.io docker-compose-plugin

# Install NVIDIA Container Toolkit
curl -fsSL https://nvidia.github.io/libnvidia-container/gpgkey | \
  gpg --dearmor -o /usr/share/keyrings/nvidia-container-toolkit-keyring.gpg
curl -s -L https://nvidia.github.io/libnvidia-container/stable/deb/nvidia-container-toolkit.list | \
  sed 's#deb https://#deb [signed-by=/usr/share/keyrings/nvidia-container-toolkit-keyring.gpg] https://#g' | \
  tee /etc/apt/sources.list.d/nvidia-container-toolkit.list
apt update
apt install -y nvidia-container-toolkit
nvidia-ctk runtime configure --runtime=docker --set-as-default
systemctl restart dockerStep 5: The Docker Compose Stack
Here's the full docker-compose.yml running the AI stack:
services:
  ollama:
    image: ollama/ollama:latest
    container_name: ollama
    volumes:
      - ./data:/root/.ollama
    ports:
      - "11434:11434"
    restart: unless-stopped
    deploy:
      resources:
        reservations:
          devices:
            - driver: nvidia
              count: all
              capabilities: [gpu]

  open-webui:
    image: ghcr.io/open-webui/open-webui:latest
    container_name: open-webui
    depends_on:
      - ollama
    ports:
      - "3000:8080"
    volumes:
      - ./open-webui-data:/app/backend/data
    environment:
      - OLLAMA_BASE_URL=http://ollama:11434
    restart: unless-stopped
The deploy.resources.reservations.devices section is what tells Docker to pass the NVIDIA GPU into the Ollama container. Without the NVIDIA Container Toolkit installed, this will fail with "could not select device driver nvidia."
Once everything is running, Open WebUI gives you a ChatGPT-like interface to interact with your local models directly from the browser:
Step 6: Pulling Models
With 12GB VRAM on the RTX 3060, these models run entirely on GPU. I found that Microsoft's Phi-4 works surprisingly well for its size, and the Qwen models are very solid.
| Model | VRAM (min) | Notes |
|---|---|---|
| phi4:14b | ~10-12 GB | Microsoft model. Fits perfectly on a 12GB card at 4-bit quantization. |
| qwen3.5:9b | ~8 GB | Fast, good reasoning. Great for tool calling and general tasks. |
| qwen2.5:9b | ~8 GB | General-purpose model. |
| qwen2.5-coder:7b | ~6 GB | I use it for VS Code tasks and simple coding. |
| mistral:7b | ~6 GB | Classic 7B model, runs very fast. |
| llama-guard3:latest | ~6 GB | Safety model for filtering outputs. |
docker exec ollama ollama pull phi4:14b
docker exec ollama ollama pull qwen3.5:9b
I usually pull models based on research from Reddit or canirun.ai. It helps knowing exactly how much VRAM a model needs before you let Ollama try to load it.
VS Code Integration
Since Ollama exposes an OpenAI-compatible API on port 11434, any machine on my network can use it as a coding assistant. I use the Continue extension for VS Code:
Below is my Continue config.yaml example:
# Continue.dev config.yaml
models:
  - name: Qwen 2.5 Coder
    provider: ollama
    model: qwen2.5-coder:7b
    apiBase: http://10.0.0.11:11434
    contextLength: 16384
  - name: Phi-4
    provider: ollama
    model: phi4:14b
    apiBase: http://10.0.0.11:11434
contextLength: 16384contextLength to at least 16384 (16k) for
coding. If you have the 12GB VRAM, you can push it to 32768 (32k) for larger codebases. This "memory" is what
allows the AI to see more of your project at once.
My laptop stays cool while the Dell tower in the other room handles the heavy lifting, and if your server is in your room you're definetely going to hear fans spinning after each prompt :). Ctrl+L opens chat, and tab-complete works using the local model.
Monitoring
A few useful commands for keeping an eye on Proxmox health:
# GPU power draw and temperature (updates every 5 seconds)
nvidia-smi --query-gpu=power.draw,temperature.gpu --format=csv -l 5

# What model is loaded and GPU/CPU split
docker exec ollama ollama ps

# CPU temperatures
sensors

# Container resource usage
docker stats --no-stream
Under normal load with the 9B model, the RTX 3060 sits at 50-60°C and draws 30-80W. Under sustained inference it peaks around 75°C and 170W. The Dell 460W PSU handles it without issues - total system draw under maximum GPU + CPU load is around 280W, well within the 385W 12V rail capacity.
Overall Experience
The RTX 3060 12GB is a good start. Once models are downloaded, everything runs fully offline, meaning no internet connection needed. Of course, If you're coming in with expectations of running ChatGPT or Claude AI, you're not going to be happy with models that are 95% smaller and slower anyway because you have a hobby grade GPU.. But in general, there are a lot of use cases where this setup works well. It's cheap, fits in most workstation towers, and has enough VRAM to run useful models. If you starting fresh and have the budget, I'd suggest going with a used RTX 3090 24GB or an Apple Mac Mini with 24GB+ unified memory - that jump to 24GB VRAM opens up the larger 24B+ model class.